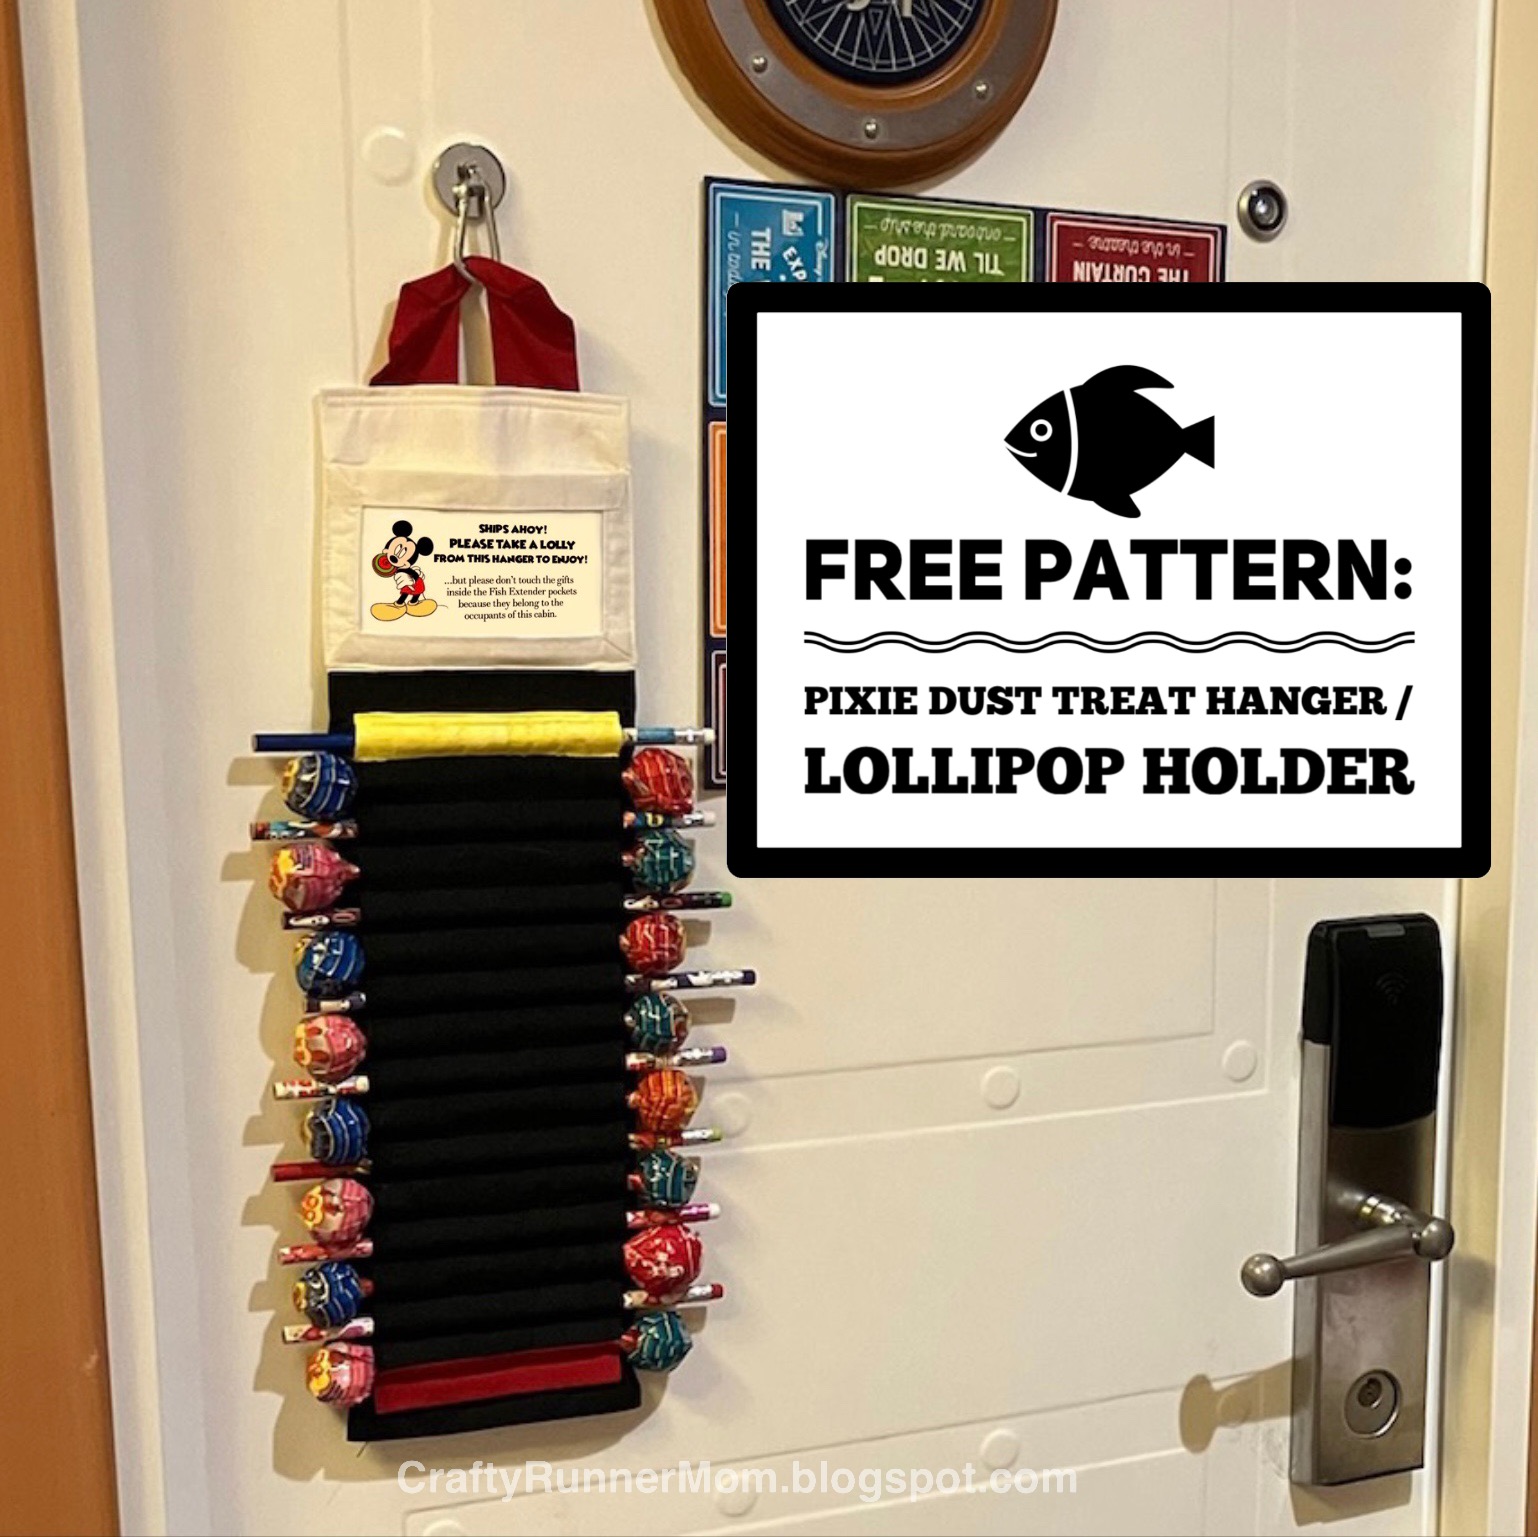
For a Disney Cruise, I wanted to join the fun of distributing “Pixie Dust”. What is Pixie Dusting? It is the act of giving out little trinkets to perfect strangers just for the sake of being kind & spreading joy. Some passengers hang fabric treat holders outside their cabin doors to give out lollipops, pencils, glow sticks, candy canes, reusable straws, or anything long and skinny that fits in the holder. So I made a Pixie Dust treat holder to match my fish extender. It even has a clear pocket at the top that fits a 3x5” index card so that I can swap out a decorative sign to match the seasons.

Here is the finished lollipop holder. It’s half filled with pencils.

A matching pair: Pixie Dust Lollipop/Treat Dispenser and a Fish Extender
Here is some Pixie Dust from me to you, the reader. Here’s a FREE pattern and tutorial on how to sew your own Pixie Dust Treat Hanger!
MATERIALS:
- Fabric for front: Cut 9” wide x 14” tall.
- Fabric for back: Cut 12” wide x 19” tall.
- Fabric for the pocket window frame: Cut 2.5” x 23” strip and turn it into double folded bias tape (click here for a video tutorial).
- Clear Vinyl- 8 Gauge for the window frame: Cut 6” wide x 4” tall.
- Double-Sided Fusible Interfacing: Cut one piece 4.5” wide x 13” tall for the front piece, and one piece 6" wide x 18” tall for the back piece.
- Ribbon or fabric strap for hanging loop. ALTERNATE OPTION: Metal D-ring.
- Magnet Carabiner hook
PATTERN PIECES

INSTRUCTIONS
- INTERFACE THE FRONT & BACK PIECES: With the fabric pieces wrong sides facing up, lay the corresponding interfacing pieces along the centers of each fabric piece as shown in the diagram. Fold the fabric along the dotted lines in the diagram until the fabric edges meet in the middle to completely cover the interfacing. Iron to fuse these layers in place. The side where the edges meet in the middle is now the “wrong side”. Fold the top and bottom edges towards the wrong side and sew the hems.

- WINDOW FRAME PIECE: Bind the edges of the clear vinyl piece with the bias tape to frame the window. Here’s a video tutorial on how to bind the edges. ALTERNATE OPTION: If you don’t have clear vinyl, don’t worry (I didn’t either when I made my hanger). You can just sew the fabric strips around some paper, and then cut out the center of the paper afterwards.
- ATTACH THE HANGING LOOP: Lay the BACK PIECE wrong side up. Sew ribbon/fabric of desired length to the top to make a hanging loop. ALTERNATE OPTION: Attach a D-ring to the top with a 1” length of ribbon placed thru the D-ring, folded in half, and sewn to the top.
- ATTACH THE FRONT PIECE: Lay the BACK PIECE right side up. Lay the FRONT PIECE on top of the back piece so that the bottom edges of both pieces are aligned and centered. Make sure that the FRONT PIECE’s wrong side is facing the BACK PIECE’s right side. Pin in place. Stitch front to back in 3/4" wide rows as shown by the dotted lines on the diagram below.
- ATTACH THE POCKET WINDOW FRAME: Lay the WINDOW FRAME PIECE on top of the back piece. Stitch along the bottom and side edges only, leaving the top unstitched in order to make a pocket for a 3x5” index card. ALTERNATE OPTION: Skip the window frame and use this space to afix another embellishment or your choosing.
- Clip the magnetic carabiner onto the top of your treat holder. Fill the treat holder with goodies and hang it outside your cabin door. And enjoy hearing the squeals of delight when other passengers get pixie dusted as they pass by your door.


For links to other crafts that I made for a Disney Cruise, check out: