I was invited to my first-ever "Dapper" event at Disneyland which meant that I needed a Dapper outfit. What is "Dapper?" Well basically the concept comes from
Dapper Day, an independent social gathering event when fans show up at the Disney Parks dressed up in clothing styles from 1901-1966 (the years Walt Disney was alive).
So where did I turn for artistic inspiration to find my Dapper outfit? Pinterest of course! To my disappointment, there weren't a lot of DIY tutorials when I searched for "Dapper Day," just mostly were beautiful photos of other people's outfits. Well, being the Crafty Mom that I am, I decided to accept the challenge of making the outfit myself...doing so in an Eco-friendly way, and adding it to Pinterest.
STEP 1: FIND INSPIRATION.
Isn't
the above outfit from the 1940s just beautiful? I also started
falling in love with Peter Pan collars & sailor collars. I wondered if there was a way to combine the collars with the dress. Then I found this:
The "Vixen 60s Oh So Striped A-line Dress" from
Top Vintage.
STEP 2: GO THRIFT SHOPPING.
The next thing I did was go to a local thrift shop, and luckily I scored these:
STEP 3: BEGIN DRESS SURGERY.
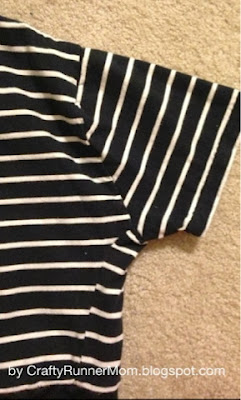
I cut both dresses at the waistline. I saved the bottom half of the striped dress to make sleeves and the triangle-shaped flare of the skirt.
I saved the top half of the black dress to make the collar.
STEP 4: PIECE THE FABRICS TOGETHER.
I cut a slit on the side front of the black skirt. Then I sewed a triangle-shaped wedge of striped fabric to fill in that slit. Then I sewed the black skirt to the striped top.
STEP 5: HOW TO ADD SLEEVES TO A SLEEVELESS DRESS.
I Googled "sleeve pattern" and found a bunch of photos showing that sleeves have the same bell-shaped curve on the top. The difference in fit is based on how STEEP the curve is & how LONG the curve is.
If the curve is STEEP (aka. tall & skinny), then the finished sleeves will lie more vertical & have less comfort, like a suit blazer. But if the curve is SHALLOW (aka. short & fat), then the finished sleeves will lie more perpendicular to the body & be more comfortable, like a T-shirt.
In order to fit properly, the LENGTH of the sleeve's curve has to equal the circumference of the arm hole. So I placed a piece of string around the edges of the armhole to get the circumference & then cut the string into the length of the circumference. I then taped both ends of that piece of string to the corners of the paper sleeve pattern. I shaped the loose part of the string into a bell-shaped curve. Once I was satisfied with its shape, I traced its shape onto the paper.
Once I made that rough pattern, I traced it onto a new sheet of paper but this time I added 1/4 to 1/2 inch of seam allowance. I then used this final pattern to cut out the sleeve material.
Then I sewed the sleeves onto the dress.
STEP 6: HOW TO ADD A SAILOR COLLAR OR PETER PAN COLLAR TO A TOP.
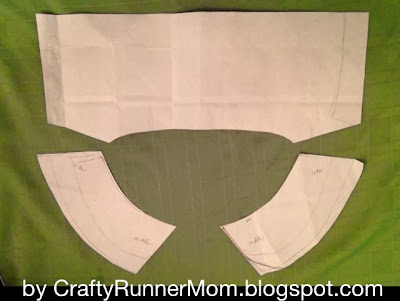
I drew this pattern myself
using the technique described by Erin of Sutton Grace on the Leafy Tree Top Spot blog. Once I was satisfied with the shape of the front & back collar pieces, I retraced those pieces onto another sheet of paper, this time adding 1/4-1/2 inch of seam allowance. Then I used this final pattern to cut out the collar material.
Then I sewed the collar onto the neckline of the dress using
the technique described by Erin of Sutton Grace. I made a binding strip out of leftover black dress material {Yay! More upcycling!}, then used the binding to cover the raw edges of the collar/neckline.
STEP 7: ADD THE FINISHING TOUCHES.
I had some old white buttons that had been salvaged years ago from another piece of clothing {Yay! More upcycling!}, so I sewed them on for decoration.
I also added a piece of white grosgrain ribbon to the collar to serve as a tag, but this is just optional. {I just like seeing a tag when I'm getting dressed because it helps to orient me to which side is inside & which side is the back.}
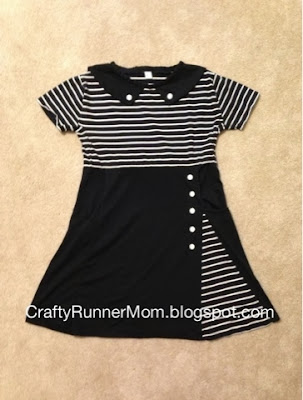
Et Voilà! A Dapper retro upcycled dress is complete!
P.S. Dressing in Dapper attire with my husband was fun! I'm looking forward to planning another outfit for a future Dapper Day.


