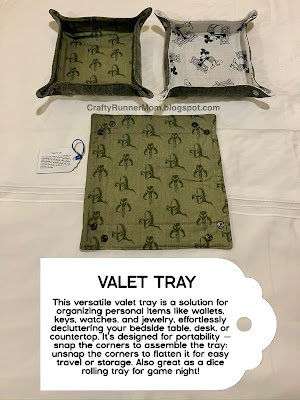
Here are instructions on how to make a simple valet tray yourself:
- Cut two 10”x10” squares from fabric.
- Cut two 9.5”x9.5” squares from fusible interfacing. Alternatively use just one square of fusible fleece.
- Iron the interfacing to the wrong side of the fabric squares, making sure it’s centered.
- With right sides facing, using a half-inch seam allowance, sew along all 4 sides but leave a 5” space open on one side.
- Turn the item right side out using the opening from Step 4.
- Top stitch the opening and then around all 4 sides of the square.
- Stitch “fold lines”1.5” in from the outside edge. Do this on all 4 sides.
- Attach a pair of KAM snaps to each of the 4 corners.
- Voila! Ready to gift or use!
Any fabric can be used, and you can customize it any way you want. You can even use up your scraps to make a crazy log cabin patchwork tray. This is one that I gave to my Mom for Christmas a few years ago, made from upcycled courduroy pants.
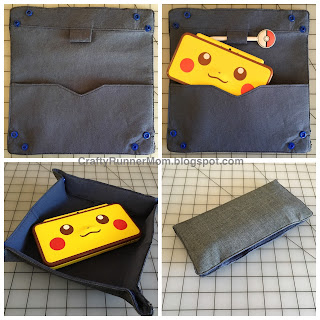
Another customization that I made a few years ago was to make a complex version that converted into an envelope clutch. I made this by eliminating the sewn “fold lines”, adding a slip pocket, adding a pen loop, and making sure that the KAM snaps matched when folding the clutch in half.
I typically gift these trays with a gift tag that says:
“This versatile valet tray is a solution for organizing personal items like wallets, keys, watches, and jewelry, effortlessly decluttering your bedside table, desk, or countertop. It’s designed for portability — snap the corners to assemble the tray; unsnap the corners to flatten it for easy travel or storage. Also great as a dice rolling tray for game night!”
To make things easy for you, here is a printable set of 6 gift tags that you can print out onto an 8.5”x11” sheet of paper:


